Showing posts with label recipes. Show all posts

Monday, June 9, 2014

Itty-Bitty Lemon Meringues

I figured I'd start off my week with a blog post. What do I have better to do on a cloudy Monday? You're right, nothing! Well, except maybe sleep, especially after this past weekend. I did very little sleeping, but a whole lot of memory making. In any case, staying up until the wee hours of the morning quickly reminds me that I'm no longer in my 20s.

Anyway, from time to time my mom makes cookies for people for special occasions. She made over 5,000 cookies from September to December last year. When she makes them she always ends up with some that aren't pretty enough or are slightly burnt that only make it to the "plate of mishap cookies." This plate sits at her house for the taking by anyone who passes through. Let me tell you, it's true, even too much of a good thing ("the plate of mishap cookies") is a bad thing.

So, I think my mom was getting tired of making cookies, because she started making pies. Just miniature ones. Which, don't be fooled, are pretty much still cookies if you ask me. But, perhaps, cookies with a lil' flare if you will. Lemon Meringue is her favorite pie. It is actually quite a few of the house passer throughers favorites too. Hence, her inspiration for these cookies, which I am dubbing Itty-Bitty Lemon Meringues. She also loves to put meringue on anything, if she can. I will admit it does make things look just a tad fancy.

These cookies are pretty simple if you have the right tools and the time. Also, when my Mom and I make cookies we always spend one day making the dough and then another actually baking the cookies. This works well, because most cookie dough needs to chill in the frig before handling.


Having the "tassey stomper" (shown above) and the small cookie scoop makes this all go a lot quicker. This is the pudding mix we use for lemon meringue anything. 


You'll also need some tassey pans. You can find them at pretty much any store that has bakeware. Once you have these things on hand, you're set to go. 

Itty-Bitty Lemon Meringes
Crust: 
8 oz. cream cheese
2.5 sticks margarine
3 cups flour

Filling:
1 2.9 oz. package of cook and serve lemon pudding and pie filling
1/2 cup sugar
2-1/4 cup water
2 beaten egg yolks

Meringue:
3 egg whites
1/3 cup sugar


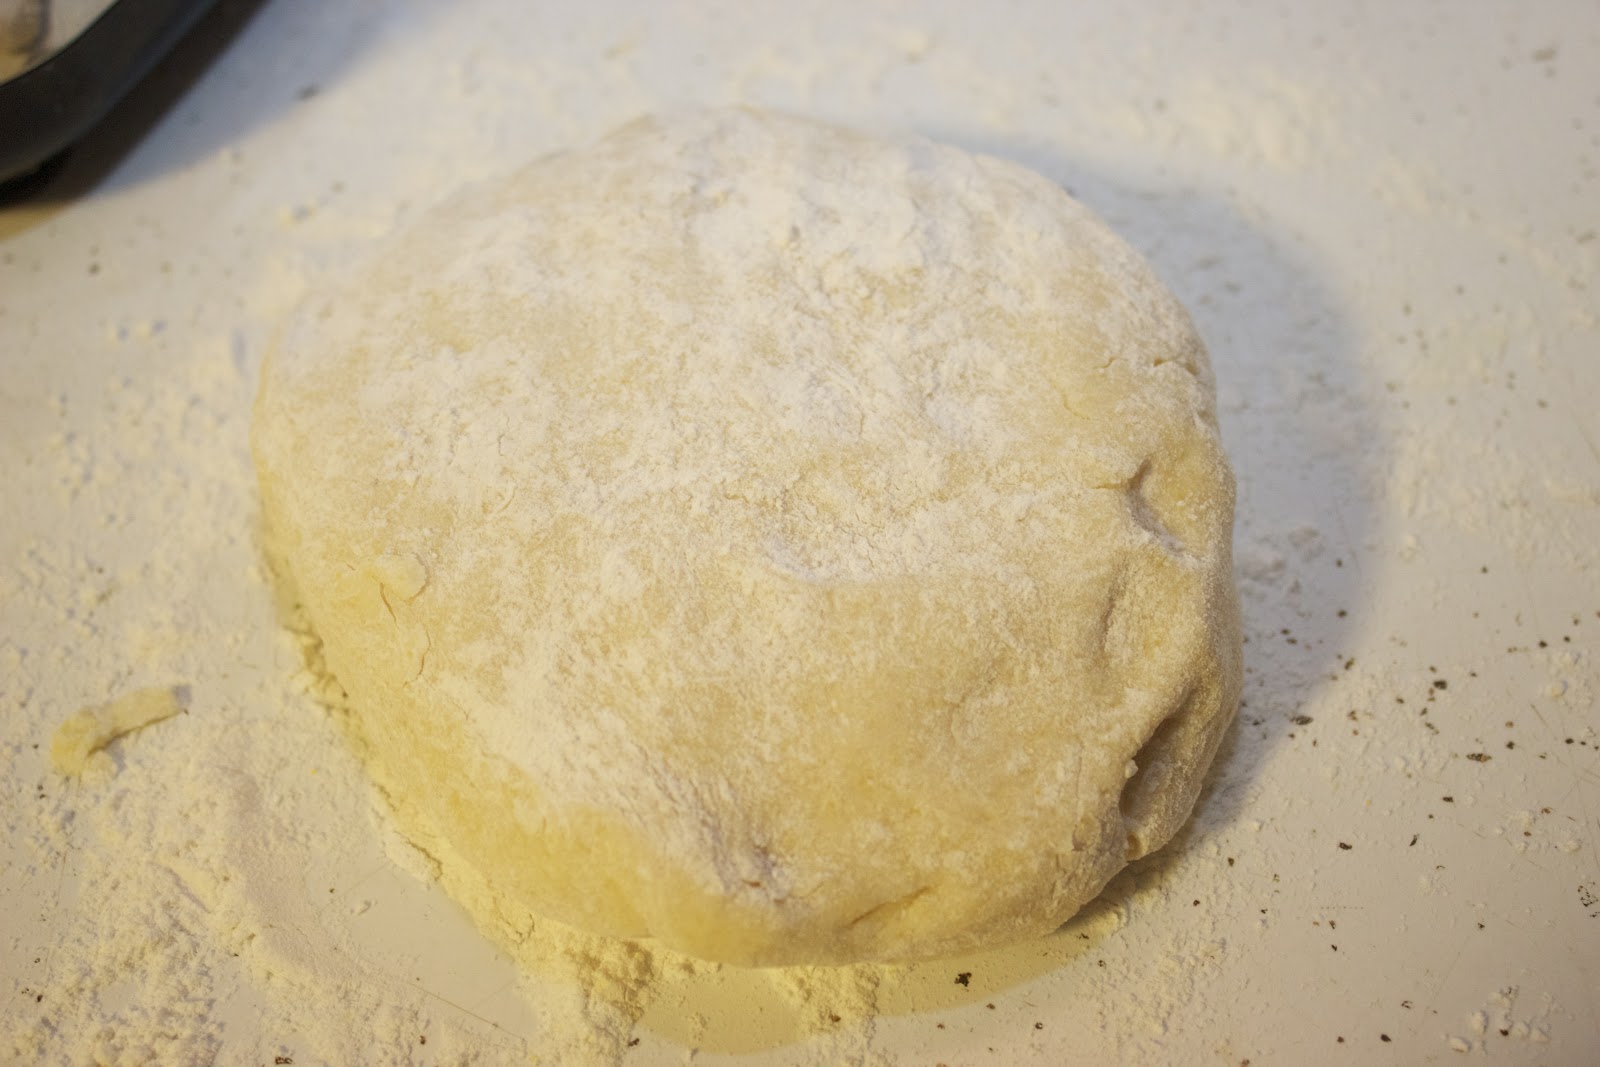
Start by making the crust the day before. To make the crust, cream together the cream cheese and margarine with a mixer. Add the flour. Refrigerate over night. If the dough is too wet the next day add a little more flour. Roll the dough into small balls. The size all depends on how dainty you really want to make these cookies. I usually roll the balls into roughly a bouncy ball size or a little bigger. Set the ball into the tassey pan. Dip the tassey stomper into flour and then "stomp" your dough ball. Slow, gentle and steady is the way to go here. Trying to get all walls of the tassie even is more difficult than it looks. You also do not want really thick walls (you don't want all dough and hardly any filling), so finding the right size dough ball for your pan may take a few tries. Practice makes perfect.

Bake the tassies at 375 degrees F for 12 minutes on the top rack (putting only 4 trays in the oven at one time seems to work best). They'll be slightly golden. Remove from oven, let cool for a few seconds and then restomp the cookies down. Return to oven and bake only 4 more minutes (do not let them get very brown). Remove from oven and remove the tassey cups from the tassey pans once cool enough.

While the cookie part is cooling make the filling. Stir the pudding mix, sugar, 1/4 cup water and the egg yolks in medium saucepan. Stir in the remaining 2 cups of water and bring to a full boil, stirring constantly. Remove from heat and cool 5 minutes, stir twice. Scoop into the cookie crust using the cookie scoop or a small ice cream scoop, you want to fill them to the top. Let cool while making the meringue.

To make the meringue beat 3 egg whites in a large bowl (I have the best luck in a chilled clean and dry bowl) until foamy. Add the sugar and beat until the whites form stiff peaks. Once stiff, spread the meringue over the lemon filling. You want to be sure that the meringue covers the entire top, and seals against the crust. If the meringue does not touch the cookie or crust it will pull away from the edges and shrink on the top of your cookie. This goes for pies too or anything you're making with meringue. Use a spoon to pull the meringue to a point or to make a design. Bake the meringue/cookies at 375 degrees F for 5 minutes or until it starts to brown. You really want to keep an eye on the meringue.

And Voila! you're done and they're ready to enjoy.

They're just too cute.

So, I hope you had a chance to make lots of memories this past weekend too. And are enjoying your Monday, even if it is a cloudy, chilly, hard to roll out of bed kind of day.

Tuesday, May 27, 2014

Rhubarb Iced Tea

Wow, how time flies. It has been almost a year since I posted anything within my blog. I have no idea where the time went, but I think it probably went to preparing lectures, grading papers and making students cry. Just kidding. I would never purposely make a student cry.

That doesn't mean they don't cry though. They do. More often than you'd imagine. Mostly because they waited until the last minute to care about their grade.

Plus, it was a really loooong winter. Incredibly long and I love winter. I really do. I love big warm sweaters, comfy boots and hot chocolate. However, by the end of April I was ready for some desirable weather....where the AIR didn't burn the skin on my face, or freeze the snot in my nose.

So, we've finally come to have some weather that doesn't require a warm scarf. This could mean one of two things, I have more time or I'm just motivated to do more than just crawl up in a ball under some heavy blankets.

And here we are at spring. Beautiful beautiful spring. With spring comes lots of delicious things like rhubarb and enough mud to make me dread letting my dog out to pee.

We were planting in the garden today, but a bunch of storms came through which cut our planting time short. So, while I was retreating in doors I decided to look up some new and different recipes for rhubarb. At the time, I was thirsty so this iced tea really caught my attention. It definitely quenched my thirst and there was nothing difficult about it.


I found the recipe in a Martha Stewart magazine from probably a decade ago and then I found it on Pinterest.

Rhubarb Iced Tea
10 cups water
10 rhubarb stems (cut into halves or thirds)
1/2 cup sugar (or more to taste)

Add the 10 cups of water and rhubarb stems into a large saucepan, bring to a boil and then simmer for roughly an hour. Strain the liquid into a pitcher and add 1/2 cup sugar while hot. Stir. Chill before serving. 

Tips: If you want the pretty pink color, pick the younger thinner rhubarb stems. They have more red than green and will make your ice tea the appealing pink color you want, instead of green. Also, add the sugar while it's hot so that it can dissolve into the tea easier.


You know what else is abundant during spring? These orange poppy flowers. They'll brighten up any yard.


Enjoy the rhubarb iced tea! 

Monday, August 12, 2013

The Nervous System, Food Induced Comas and Pizza....

I napped today. Napped!! Nothing feels as good as a Monday late afternoon nap. Nothing. I don't know about you, but I'm a sleeper. I need to sleep. Maybe this is one clue that I'm not yet a mother. However, if I could, I would sleep all day. I don't even really have to be tired. Unfortunately, that never gets to happen.  Nonetheless, I have never ever laid my head down on a pillow and had a hard time falling to sleep. Even when I'm stressed or worried. 

I feel for those who have trouble sleeping. And those whose minds wont let them. 

A full belly always puts me to sleep. For physiological reasons of course. It has everything to do with your parasympathetic nervous system and insulins enzymatic pathway (and little to do with that well known amino acid culprit known as tryptophan. In fact, turkey contains the same amount of tryptophan as most meats). Scientists and the likes often refer to the parasympathetic nervous system as the rest and digest branch of your peripheral nervous system or autonomic nervous system. It's called this because it signals your body to rest and restore energy. It can cause the pupils of your eyes to contract, promote digestion of food and slow your heart rate, breathing rate and lower blood pressure. The mass of food in your stomach signals the parasympathetic nervous system and your body to slow down. And it's all involuntary so you can't even be like "hey, stop it, I'm not tired!"

Really, you should actually probably blame the copious amounts of mashed potatoes and rolls the next time you eat thanksgiving dinner or any meal high in carbohydrates. It has been shown that meals high in carbohydrates signal the release of insulin. Insulin then signals for certain amino acids (protein building blocks) to be taken up and turned into muscle. But tryptophan is not used for muscle building, so it's levels become elevated compared to the other amino acids present. So, the body says hey, I have an increased level of tryptophan and nothing competing against those levels or fighting against it to get to the brain. (Your body is a battle field of concentration/pressure/electrical gradients...and they duke it out using different types of diffusion). So, tryptophan glides right through to the fluid in the brain. And there it is converted into serotonin (Richard J Wurtman and Judith J Wurtman, et al. 2003. Effects of normal meals rich in carbohydrates or proteins on plasma tryptophan and tyrosine ratios. Am J Clin Nutr  vol. 77 no. 1 128-132). Ha, and from there you don't have a chance of fighting the tired feeling. Serotonin is further converted into melatonin and bam! Full blown food coma. 

THANK YOU mashed potatoes and gravy, I totally wanted to be unresponsive for the rest of the day.

Lucky for you I have the perfect food coma meal to share with you. French Bread Pizza. I promise, if you eat enough it's coma inducing. Thank me later.

I saw this recipe over at the Cozy Apron. It looked rather good, so I thought I'd give it a try with what I had on hand. 

Artichoke French Bread Pizza
1 loaf french bread, sliced in half
1 c mozzarella and brick cheese (just mix the two)
1/4 c black olives, halved
6 slices salami (I had genoa)
1 15 oz jar quartered artichoke hearts, drained and patted dry
6 large basil leaves, chopped

1 15 oz jar fire roasted tomatoes
1 15 oz jar crushed tomatoes
pinch of red pepper flakes
1 jalapeno, minced
4 garlic gloves, minced
1 tsp oregano 
salt and pepper
2 tblsp olive oil and some to drizzle

I made the tomato sauce first. It's the logical thing to do. Heat the 2 tblsp of olive oil on medium heat. Throw in the garlic, red pepper flakes and jalapeno. You want to be sure that the olive oil is not too hot or that you do not over cook the garlic (It is really easy to burn garlic if you ask me and then it tastes super bitter and well....gross). You just want to infuse the oil with the flavors, so cook until the garlic just starts to turn golden in color.  Then mix in the fire roasted tomatoes, crushed tomatoes, oregano and salt and pepper to taste. Let simmer on low while you make the pizza.

Drizzle the french bread with olive oil and toast in oven for 5-10 minutes on 350 degrees F. You just want the pizza to start to get crusty. Once golden brown remove it from the oven and take a clove of garlic and scrape it against the toasted french bread. While the bread is toasting you can fry the artichokes and salami. I threw the salami in the skillet first on med to high heat, and then fried the artichokes in the fat from the salami. The salami will bubble up a little when finished and the artichokes will turn a nice brown color. 

Now you're ready to assemble your pizza.  Add a layer of your tomato sauce, the cheese, the salami, the artichokes and olives. Cover with foil and bake in oven for 10 minutes or until cheese is melted at 350 degrees F. I covered the pizza because I did not want the bread to toast any more, it was crusty enough. However, if you like it extra crusty leave it uncovered. Finish it with a drizzle of extra virgin olive oil and the basil. 


Of course there are some of those in my family that are astonished by the fact that I would put artichokes on pizza. So, the traditional french bread pizza, with just some cheese and pepperoni is shown on the left. You can see that this recipe is easily interchangeable and the topping possibilities are endless. 


I, consequently, loved the artichokes. I'm sure you will too. Enjoy!

Thursday, August 8, 2013

Blueberry Basil Smoothie

So, I am currently teaching a very content laden course in just 5 weeks. This course is usually taught on a normal 15 week schedule and can be overwhelming even then. I understand why students register for this class, it seems like a great idea at first. Two main courses knocked off in just 10 weeks. Plus, most of them need to pass it to get into the nursing program that starts in the fall. I promise, it's not a great idea.

This week is week 4 or week 9 for those who took the first and second classes back to back. I could tell today that it was getting to them. They would not stop giggling!

At one point there was a story about a a girl (who had the misfortune to lose her arm at some point) who is friends with a little person (they were not politically correct, by the way). Apparently, they both got drunk one night and the story went on until it ended with one of the students going around mimicking the camel from that Geico commercial asking everyone what day it was. I have no idea how those two things came together, but they did.

It was hump day. And apparently that was a very funny fact.
One of these days I'm going to have enough smarts to write down the crazy things my students say when they're supposed to be working.

Fyi...giggling is contagious. I might have caught the affliction by the end of our 4 hours together too. But, I'll take it, because truth be told I'm usually dealing more with tears than giggles at this point in the course.

So, any good summer day that included copious amounts of giggling also needed to include a fabulous smoothie. You know, because giggling makes me thirsty.

You can now add this to your smoothie repertoire; if you enjoy basil and blueberries. I know I certainly do.

Blueberry Basil Smoothie
1 c blueberries
1/4 c almond milk
1 tblsp honey
5-7 medium/small  sized fresh basil leaves
handful of ice cubes


Throw everything in the blender (liquid first) and blend blend blend. You can add more honey to your sweet tooth liking.


Enjoy!

Tuesday, July 30, 2013

Tarragon Corn on the Cob

So, it's been a few weeks since I posted last. I had my family visiting for awhile, and as I get closer to the start of the semester I tend to get busier and busier. I love it....not really. I really enjoy lazy days. Some people say they'd go crazy without work or something to do. I'm not so sure I'm that person. 

In any case, I hope you all have been enjoying your summer and keeping busy. I know I have. 

Yet, I'm already becoming depressed in the fact that summer is almost over. So, I'm making it a priority to enjoy the weeks of august by spending every moment I can outside. Sooner than later the weather will be crummy and it will be months before I can go outside without wearing layers again. 

With the end of summer comes the abundance of sweet corn or corn on the cob. It is probably one of my favorite summer treats. I could eat it every day. Every day, I tell you.

So, I bring to you this recipe. Over the 4th of July I made this corn to take to our annual 4th of July picnic. I was a little leery. I was not sure how tarragon and soy sauce would go over with my traditional food eating family. Nonetheless, there were no left overs. So, there ya go. Never underestimate the palate of your family. 

The recipe for this corn was originally found on Taste of Home. It called for the corn to be wrapped in foil and grilled individually. No way was I wrapping 24 ears of corn in foil and grilling it before our picnic. I improvised, and it turned out pretty well. I promise that rarely happens for me. This recipe is for 4 ears of corn. I did not increase the recipe by six fold. I also improvised the amounts as well.

Tarragon Corn on the Cob
24 large ears sweet corn, husks removed
8 large springs tarragon, plus 2 tblsp minced
1 stick butter, melted
1/2 c soy sauce
1/4 c chicken broth

Prepare ears of corn by husking and removing silk. I cut them each in half and placed them in a foil lined roasting pan. Mix together the minced tarragon, melted butter, soy sauce and chicken broth. Pour this over the corn evenly. Randomly place tarragon sprigs on top of the corn and then cover corn tightly with foil. Bake at 350 degrees F for roughly 30 minutes. Just check it after 20 minutes to see if it is steamed to softness. 


I don't have a picture of this corn finished. I was in a rush that morning and didn't get a chance to take too many photos. Enjoy the recipe and let me know what you think!

Tuesday, July 2, 2013

Oh Brussel Sprouts How I Adore You, Oh and You Too Bacon

I bet you never heard that before. How many of you actually adore brussel sprouts? Well if you do, fantastic! We have something in common. If you don't, I'm about to blow your mind (maybe not, but here's to hoping). 

You know what's great about brussel sprouts? They're like baby cabbages, and I like anything that's baby. Kittens, puppies, children. All those things are cuter and dare I say better than their larger counterparts. 

I wont go as far as to say that brussel sprouts are cute, but they do have a lot to offer. Studies have shown that they can lower your cholesterol, protect your DNA, and sometimes even help thyroid function. And they contain glucosinolate! So, eat up folks!

You can cook them anyway you like really but here are two ways that I prefer.

Garlic Roasted Brussel Sprouts
1 package brussel sprouts (about 12 oz)
2 tblsp extra virgin olive oil
2 cloves garlic, minced
salt & pepper

Prepare brussel sprouts by pulling off any loose leaves. If they're large half or quarter them. Toss them in a bowl with olive oil, garlic, and salt and pepper. Lay in a single layer on a foil covered cookie sheet or pizza pan. Bake at 400 degrees for 20 minutes or until starting to look crispy.

Do not over cook because they will start to become bitter. 


Bacon Brussel Sprouts
1 package brussel sprouts (about 12 oz)
1 lb bacon
1 tsp red pepper flakes
1 tblsp extra virgin olive oil
water
salt and pepper

Bake bacon in oven until crispy. I usually put it on the broiler pan so that the fat can drain through. While the bacon is baking steam brussel sprouts. Just take a skillet, put about of inch of water in the bottom, add brussel sprouts and cover. Let on stove stop on medium heat for 10 minutes or until water has evaporated and the brussel sprouts are tender. If any water remains remove it. Add extra virgin olive oil and let brussel sprouts fry a little to brown. Crisp in bacon and add red pepper flakes and salt and pepper to taste. 

Monday, July 1, 2013

Salad Revamped...with More Hunger Quenching Capabilities

Salad, it's whats for dinner. At least it should be, right? A nice hunger quenching, mouth watering salad.  I'll bet though that most of you have never defined a salad has hunger quenching or mouth watering. Lets face it, most salads don't hit the spot. After all, most lettuce is 95% water. So, even if it did fill you up at the time, that feeling is not going to last long.

That means it's all in the toppings. Just like in an ice cream sundae. I mean ice cream sundaes just aren't the same without the perfect amount of nuts, syrup or whatever your heart desires. So, you have to pay just as much attention to your salad toppings as you would your ice cream sundae. And realistically this salad offers a lot more...as far as nutrition goes. Unless you're feeding a broken heart or a neglected soul. Then stick to the sundae. Yeah, definitely eat the sundae.

Black Bean and Corn Salad
1 head iceberg lettuce, chopped
1 c corn
1 15 oz can black beans, rinsed
1 red pepper, chopped,
1 green pepper, chopped
1 c pepperjack cheese, grated
4 green onions, chopped
8 hard boiled eggs, peeled and halved

That great thing about salad is that they're easy to make. Just throw all ingredients into a bowl and toss. Unless you have a family like mine, who thinks eating beans in a salad is heresy. Then you separate them as shown in the picture below, so they themselves can pick their own toppings.


You can pair this salad with pretty much any dressing, but I'd choose something tangy. For instance this goes well with a homemade cilantro lime dressing like this one:

Cilantro Lime Dressing
1 cup plain greek yogurt
a handful of cilantro
juice of one lime
salt and pepper

Throw all ingredients in a blender and blend blend blend. If the dressing is a little tight, just add some lemon grapeseed oil or extra virgin olive oil to your dressing until it reaches your desired consistency.


Friday, June 28, 2013

Gobs...Part 1

I'm sure anyone outside of my little area of west central Pennsylvania calls these delicious bits whoopie pies, but here we call them gobs. I'm not sure where the word originated, or why it hasn't caught on. It's a perfect word, wouldn't ya say?

Maybe it came from the fact that a slang word for mouth is 'gob' and you can just stuff these into your gob..... one right after the other. I'm pretty sure I've seen male members of my family eat them like they're going out of style.

Anyway, a traditional gob here is of the chocolate variation, but you can get them of all sorts. For instance, pumpkin, peanut butter and jelly, lemon cream, and the list goes on.  So, while browsing the internet one day I came across a different kind. Strawberry milk! I've never had them before so I decided to give them a go. For one, I love strawberry milk. For two, they're different but easy.

I came across this recipe here: Sprinkle Bake

I'm going to tell you right now, mine are not nearly as pretty as the ones on Sprinkle Bake. It was my first go at this recipe and I'm hoping the more I try this and tweak the recipe the better they look for me. Even when I make chocolate gobs (which I have done 100 times) they do not always turn out the exact same every time, because of humidity and other environmental factors that I can not control.  The strawberry milk gobs however were just as tasty as imagined.


Strawberry Milk Gobs
2 1/4 cups all purpose flour
1 1/2 tsp baking powder
1/4 tsp salt
8 tbsp white vegetable shortening
3/4 cup powdered strawberry milk mix
1/2 cup brown sugar
1 whole egg
1 egg white
1 cup heavy cream
2 tbsp milk
1 tsp baking soda
1 tsp white vinegar

Gob Filling
10 tbsp flour
2 c milk
2 c powdered sugar
1 c crisco
1 c butter
1 tsp vanilla

Note: the gob filling instructions are at the end, but I suggest making it first. 


In a mixer, mix together the vegetable shortening, strawberry milk mix and brown sugar. It should be slightly crumbly. While that is mixing, stir the flour, baking powder and salt (set this aside until the end). Add the egg and egg white to the strawberry milk mixture and beat well. Then add the heavy cream and beat until the mixture is smooth.

Now make sour milk by whisking the baking soda and vinegar in with the milk. Whisk until bubbly. Add this mixture to the strawberry milk mixture. Continue mixing. Now slowly add the flour mixture you made earlier. Continue mixing on low speed until thoroughly combined. The mixture will be thick and should look like the picture above.


Use a cookie scoop and place on cookie sheet as shown on the right. Bake at 375 degrees F for 7-10 minutes. On the day I baked them it took exactly 9 minutes. Bake them just until the edges turn golden brown and they are spongy to the touch. If you over bake them they will look more orange in color than pink. Also, they spread very little, so you can probably put them about 2 inches apart on the cookie sheet. However, this will vary depending on the weather. So, I'd bake the first cookie sheet and see how much the spread for you. 


Make the filling in advance, because the milk and flour mixture needs to cool completely. I use the same gob filling recipe for almost all gobs. Why? Because I hate overly sweet icings and fillings. This one is perfect. It comes from a very old recipe book that my mom got from a church years and years ago. The pages are literally held together by a rubber band, that's how often we use it. 

Mix together the flour and milk until there are no lumps. Cook on stove top over medium heat while whisking until thick. Let this cool completely. Cream together powdered sugar, vegetable shortening, butter and vanilla. Once combined beat in the cooled milk mixture until combined. Then it is ready to spread between two gob halves. Put as much or as little filing as you like.


I don't normally put initials on all my gobs, these were for a bridal shower. Let me know if you give these a try or if you have a favorite gob combination!

Tuesday, June 25, 2013

Not Your Normal Turkey Burgers

Today is/was a beautiful day. It was warm. There was a breeze. I got to spend my time outside mowing grass. Perfect day if you ask me.

However, I did stupidly wear a bright fuscia sports bra under my white shirt today. And after an hour of sweating the shirt looks tie-dyed perfectly around the boob area. Perfectly.

I really hope it comes out. I really liked that white shirt.

So, I'm not really a huge red meat fan. I'll chose something else, anything else, over it any day. But sometimes you just want a big juicy burger, because there is nothing like bitting into a burger. At least during the grilling season. I solve my dilemma of hating red meat, but liking burgers by substituting the red meat for turkey or chicken. This recipe is the result of it.

Turkey Burgers
1 lb ground turkey
2 chipotle in adobo sauce, chopped (plus a tblsp of the sauce)
1/2 large red onion, diced
2 cloves garlic, minced
1/2 c feta cheese
1 package frozen spinach, thawed
2 tblsp your favorite grill seasoning

Sauce
1 c greek yogurt
2 tbslp adobo sauce


It couldn't be easier. Just mix all ingredients together until everything is evenly through the meat. You don't want to overwork your meat, so only mix as much as necessary to make sure every bite has all ingredients.

Form into patty size of your choice. But remember they shrink and swell. So, I tend to make small patties but make an indent in the middle so they cook into flat burgers.


Grill 4-5 minutes on high heat to get the grill marks we all know and love. I generally then move mine to lower heat to finish cooking. It will probably take another 5 minutes, depending on patty size.

While the burgers are grilling, mix the greek yogurt and adobo sauce. Let chill until ready to serve.


Let your burger rest a few minutes before serving. Once ready top with yogurt sauce and serve on a toasted bun of your choice. Let me know what you think and what have you substituted for red meat?


Monday, June 24, 2013

Fruit Filled Waffle Cups

This past weekend was super busy. I like being busy, but sometimes it makes time go way too fast. I suppose if it was a horrible time then that would be okay, but we all know that is usually not the case. 

The weekend was filled with lots of great things and some bad. I'm not going to go into details, but I got to share a special day with a good friend, enjoy good company and bake. Nonetheless, we also found out that our uncle had a heart attack and that someone else also put a bid on my dream house. 

Our uncle is okay, thankfully.

But the dream house is now probably in someone else's hands. 

But as my philosophy has always been, what will be will be. Que sera sera. 

Anyway (do I say 'anyway' a lot? I feel like I do.), I've seen pictures of fruit salad in waffle cones floating around for awhile on pinterest. And I've always thought, what an ingenious idea! Some people are just so clever! 

I envy you clever people!

I am in a wedding and for the bridal shower I decided to make these fruit filled waffle cones. I changed them up a little. And this is what I came up with.

You should know that this recipe was to make 50 waffle cones. However, it would be totally easy to slim it down to make whatever you need. You should also know that there was not one left over. All totally gone. So, yes, they are as good as they look. 

Plus, they look pretty fancy without all the fancy work. And we all know how much I love that. 

The actual fruit salad recipe is from Taste of Home. I changed it up a little to fit what I had and to use less sugar.

Fruit Filled Waffle Cups
4 cups blueberries
4 cups grapes, sliced in half
4 cups pineapple, chunks
4 cups watermelon, chunks
4 cups strawberries, quartered
4 cups blackberries
10 oz pina colada alcoholic mix
1/4 c sugar
1/4 tsp almond extract
1/8 tsp coconut extract
50 waffle cups
2-12 oz bags of milk chocolate

Mix the pina colada mix, sugar, almond and coconut extracts. Make the fruit salad by combining the first 6 ingredients in a large container and pouring the pina colada mixture over top. Mix everything well and let sit over night. If the salad seems dry the next day make more of the pina colada mixture and add to the fruit. My fruit was excessively juicy, so I had a lot of liquid the next morning. I actually drained some of it. 


First, I decided to use mostly waffle cups instead of cones. I just thought they would be easier to eat at the bridal shower and looked more delicate. I did use some waffle cones though, because I bought up all the cups they had at the store and still needed more. Second, I was very worried about the waffle cups/cones getting soggy, since I had to do this in advance. So, to solve that problem I melted one bag of chocolate and painted the bottom of the cups and cones with it. You can literally just drop a tblsp in the bottom and then use a brush to spread it. I let the chocolate set for 15 mins.


I then filled the cups to the brim with the fruit salad made the night before. I used a slotted spoon to drain excess liquid from the fruit salad. Then, I melted the second bag of chocolate, put it in a squeeze bottle and drizzled it over the fruit and cups. And since we have mint by the billions growing outside, I picked some leaves, rinsed them and placed them on the side to add a little pop of color.


Just a little side note. The waffle cones still ended up getting soggy since they laid on their side and I did not paint the chocolate up the entire side of the cone. If I was to do this again, I would paint the entire inside of the waffle cones with chocolate. This was not the case with the waffle cups. They stayed pretty firm.

Wednesday, June 19, 2013

Cranberry and Ham Crescent Rolls

Where does the time go? Im pretty sure everyone feels the same way, but this week has flown by. I don't know where the days are going.

 I spent an hour printing a powerpoint presentation out at work. It felt like 20 mins of messing, but before I knew it I spent an hour in the work room waiting for the print jobs to spool. Remind me never to put large graphics in powerpoint presentations that are 60 slides long.

So, when you spend all day printing (okay, an hour) things you just want to come home and make something easy.

This is the result of easy. Not the healthiest thing in my list of recipes, but the easiest indeed.

Cranberry and Ham Crescent Rolls
1 lb cooked ham, diced
1 c whole berry cranberry sauce
1 container pillsbury crescent rolls

Pop open the container of crescent rolls and spread them out. Put about 2 tablespoons of the diced ham on the wider side, top with a tablespoon of cranberry sauce and roll. Bake on a parchment covered pan as indicated on the package or until crescent is golden brown.

Also, I'm pretty sure you can stuff anything into a crescent roll and it will taste amazing. Cream cheese, jelly, hot dogs all turn out well. So, I'm curious as to what you've stuffed into your crescent rolls. Anything interesting? Let me know!


Tuesday, June 18, 2013

Oatmeal Cookie Smoothie

It's smoothie weather again ( I don't drink cold things when it's cold outside, except water, maybe I'm weird). Therefore anything I can think to mix up in the blender gets tossed under the blade.

I tend to make a lot of fruit smoothies, but this one is slightly different. It tastes just like an oatmeal cookie. Yes, an oatmeal cookie. I kid you not. Without all the calories and fats.

I first saw this recipe over at Happy Herbivore. It hits all the categories for being vegan. It hits all the categories for being healthy. It hits all the categories for being a good source of minerals. More importantly, it hits all the categories for being refreshing.

Oatmeal Cookie Smoothie
1/4 c almond milk
2 frozen bananas, chunks
1/2 tsp cinnamon
1/4 c oatmeal (uncooked)
1 tblsp raisins (if you want it sweeter add more)

I threw the liquid in the blender, then the solids and blended till creamy perfection. You won't regret this one, it's easy and fulfilling.


Monday, June 17, 2013

Tofu Vindaloo

If you ask me, I think tofu is pretty scary. It doesn't look or taste like much and sometimes the texture seems a little...risque (as far as things that I willingly put in my mouth go). However, years and years ago I had it made for me and it was rather good. So, I decided to give it another go since I'm eating healthier and looking for meat substitutes.

There are definitely some cooking pros to tofu though. For instance, it pretty much will take on any flavor you want it to. All you need to add to it are spices or some sort of marinade. 

So, in order to make this as flavorful as possible I decided to go with the only recipe I know that is stock full of spices. A vindaloo. Vindaloo is a very hot indian curry, which I also had made for me years and years ago. This recipe has a lot of kick due to the cayenne pepper, so use as much of it as YOU like.


Vindaloo Spice Mix
1 tblsp ginger, minced
4 cloves garlic, minced
1/2 onion, diced
1 tsp coriander
2 tsp cumin
1/4 tsp onion powder
1/4 tsp tumeric
1/2 tsp ground mustard seed
1 1/2 tsp ground cinnamon
 1/2 tsp paprika
2 tsp cayenne pepper
2 tblsp srirachi sauce
4 tblsp extra virgin olive oil

Tofu Vindaloo
1 package firm tofu
1 (15 oz) can peas
1 (15 oz) can beans
1 (15 oz) can roasted tomatoes
Vindaloo Spice Mix


Coat bottom of pan in pam. Brown tofu, turning so brown on each side, much like you would with chicken.


Mix together all the vindaloo spice mix ingredients until creamy and then pour over the browned tofu. Cook 5 minutes. Add the roasted tomatoes and simmer for 5 mins. Then add beans and peas and cook until warmed through.


You can serve the tofu vindaloo over brown rice or noodles. It is really flavorful and provides a good spicy kick, so be sure to use as much of the cayenne pepper and srirachi sauce you enjoy.

Thursday, June 6, 2013

Goat Cheese Grape Balls

Although the weather was less than ideal, it was a splendid day. The rain always makes me want to  cuddle up under a cozy blanket with a cup of tea and a good book. That is exactly what I did, except I had the perfect little cuddle partner. My newest little niece. We talked all day. Well I talked, and she dozed off here and there. I may have dozed off too.

I am also leaving tomorrow for the weekend. A weekend full of little cousin birthday fun. So, this will be a quick little blog post.


I saw this recipe on pinterest and here awhile ago. So, they get all the credit. I wanted to give it a try, because I like goat cheese and grapes. I was curious as to whether they'd taste good together. I was a little skeptical. But really, they're pretty amazing as far as taste and texture go. They're little pops of juice in your mouth.

Goat Cheese Grape Balls
handful of grapes (about 15)
1 package of goat cheese
3 tblsp honey
1/2 chopped almonds


Roll any grape of your choice in cold goat cheese. Press the goat cheese around the grape and just roll in your hands to form a ball. Drizzle honey (as much as you like-i enjoy honey so I drizzled on a lot) over cheese and roll in chopped almonds. Refrigerate to set if goat cheese melted a lot in your hands. 


These would make great little appetizers. They worked well as just that during the Pens game last night. Unfortunately, they didn't help the Pens win.

Enjoy your weekends! Make something great and then tell me all about it!

Wednesday, June 5, 2013

Chicken and Beef Shish Kebabs

My dog and I are off to the vet today. She has grown quite weary of the vet in her old age. She shakes like a leaf soon as we enter the door. In her defense, she has gone through quite a lot there. 2 major surgeries and 2 minor ones. So, it's safe to say she knows the deal and it's rarely a good one.

When she was a puppy she would put anything and everything into her mouth. When we first got her, within the first two days she became very sick. We found out that she had a bouncy ball lodged in her intestines. I have no idea where the bouncy ball came from. We had no kids running around, so there weren't any bouncy balls running around either. I'm pretty sure that was our first sign that she was going to be.....something else.

Since then she has found a way to eat an entire bar of soap, tin foil, my favorite shoes, an entire chicken and the list goes on. None of those did any harm, in fact she gained the ability to blow bubbles out her butt and we were able to test tin foils advertising as non-stick. FYI, it truly is. Nothing stuck to it, it came out cleaner than it went in.  She has provided us with a book load of memories, days of unconditional love and uninterrupted listening, hours of cuddling, and minutes of nose nudging.

Now that she is 11 1/2 she doesn't run as fast as she used to and her arthritis makes it difficult to jump up on the bed. She also has these small strawberry looking growths, which is common to her breed. She has had a few of them removed, and that is what we are going to the vet for today. To have one on her rectum checked out. 

This is her opening up a christmas gift this past Christmas.


During the summer, her and I both love to spend our days outside. These days she loves to just lay around and soak up some vitamin D. 

I'm sure I've said before how much I love to grill when the weather is beautiful. Yesterday I grilled some marinated chicken and beef shish kebabs. They turned out rather well, so I thought I'd share the recipe with you. I used two different marinades, one for the chicken and one for the beef.

Chicken Agave Marinade
1/2 c agave nectar
7 oz pineapple juice
1/4 soy sauce
1/4 teriyaki sauce
4 ramps or shallots, diced
4 garlic cloves, minced

You will also need for the chicken kebabs:
2 lbs boneless skinless chicken, cubed
1 red onion, cubed
1 red pepper, cubed
1 green pepper, cubed
3 c pineapple, cubed

Beef Beer Marinade
1 tsp garlic salt
1 tsp onion powder
1 tblsp black pepper
1 tblsp red pepper flakes
1 tblsp smoked paprika
1/2 c beer
2 tblsp vinegar

You will also need for the beef kebabs:
2 lbs beef, cubed
1 white onion, cubed
1 green pepper, cubed
3 c mushrooms, cubed


To prepare: If using wooden skewers soak in water over night or as long as possible. Prepare marinades, by combining all ingredients in a large liquid measuring cup.  Use 1/2 to marinade meat and 1/2 to marinade vegetables. For the chicken kebabs, I used 1/2 of the marinade for the chicken, 1/4 for the vegetables and 1/4 was reserved to turn into a sauce. Marinade meat and vegetables for at least 1 hour or over night.

To prepare skewers layer vegetables and meat in any order desired. I used the vegetables and meat combinations listed above, but you can use any combination you might like. However, you want to try to pick meat and vegetable cubes that are the same size to place on a skewer, so that everything cooks in the same amount of time.


I started grilling the chicken kebabs first, because chicken takes a little longer than steak or beef. Grill on high heat to get a good sear and then move to lower heat to finish cooking. Make sure the chicken has reached an internal temperature of about 165 F. About mid way through the chicken, I added the beef kebabs. Grill the beef on high heat to your liking.


You should rotate the kebabs to grill on all sides. If the meat easily pulls off the grill plate, then the kebabs are ready to be turned. Take the reserve chicken marinade and bring to a boil in a saucepan. Whisk in 1/2 tblsp cornstarch and lower heat to a simmer. Cook until it thickens. You can baste the chicken kebabs with this the last 5 minutes of grilling.


I served this on top of a bed of rice. They were easy and looked rather pretty, if I do say so myself. 

Tuesday, June 4, 2013

Strawberry Rhubarb Tart

I'm sure I looked pretty silly today picking rhubarb. Large stick in tow, which by the way is no where near necessary for picking rhubarb. However, there are two very large milk snakes taking refuge in our rhubarb patch. They're quite aggressive as well. One of them has come flying out at me before. I try to learn my lesson the first time around. So, this time I took a stick to push around the big leaves so I could at least see what I was putting my hands into.  It was a success, I got lots of rhubarb and no snakes in sight.


Said snake.


Anyway, I'll be the first to tell you that I am absolutely the worst at making pretty pie crusts. I suppose it's because I don't have patience for it. I also don't have enough practice. My mom on the other hand is a whiz at it.

There is an easy solution to not so pretty crusts for pies. I turn everything that originally had intentions of being a pie into a rustic tart. There is no need for pinching the edges, braiding, neatly folding, weaving or spending minutes upon minutes trying to reach symmetrical perfection.

That's the reason behind this creation. I saw a recipe for rhubarb pie, which of course looked absolutely pretty. So, I decided to make a rustic tart.

Strawberry Rhubarb Tart
crust:
2 c flour
1/4 c yellow corn meal
1/3 c sugar
2/3 c butter, cold and cubed
1/2 c buttermilk

filling:
4 c rhubarb, chopped
2 c strawberries, chopped
4 c boiling water
2/3 c sugar
1/4 c flour
2 tblsp cream of wheat

1 egg white, slightly whisked with fork


Alright, I generally make my crusts in my food processor. It's just so much easier. Plus, it takes less time, which means less time for the butter or fat to melt while working it into a dough. Meaning they stay the perfectly little butter/fat pockets that melt in the crust when it is baking in the oven. So, whether you make your dough in a food processor or with a fork in a large bowl is up to you, and requires the same process nonetheless.


Mix flour, corn meal and sugar in food processor.

Add cold butter and pulse processor until it forms fine crumbles, as shown on the left. Then slowly add the buttermilk, continue pulsing until the dough starts to come together into a ball. 


Dump it out onto a lightly floured countertop and form into a disk. Shove it in the refrigerator for at least a 1/2 hour.


While the dough is chilling make the filling. Put rhubarb in a colander and pour the boiling water over it. Let water drain out and add to a large bowl. Add strawberries, sugar, flour and cream of wheat. Cream of wheat is the secret in any super juicy pie. It helps absorb the juices so they stay inside. But shhh...it's a secret so don't tell anyone.


Once dough is chilled roll it out to about a 14 inch circle on a floured surface. Be sure to flour your rolling pin as well. Make sure the dough is also about 1/2 inch thick. Transfer the dough to a foiled cookie tray or pizza pan. This part is probably easier than it seems. Just roll the dough around your rolling pin and transfer it over to the tray that way. Spoon the filling atop the dough, leaving about 2 inches of edge. Pull those edges up around the filling in any way you want. That's the best part. It doesn't matter if it's even or some come up further than others. Brush with egg white.

Bake at 375 degrees F for 55-60 minutes or until the crust is golden brown. Serve warm with some cold vanilla ice cream on the side, and you wont regret a single bite.


Simple enough, wouldn't you say? Let me know if you gives this one a try!

Also, just in case you don't have buttermilk sitting around in your refrigerator (which I didn't), you can make it. Sort of. Technically it's just soured milk, but works practically the same. Add a tablespoon of lemon juice or vinegar to a liquid measuring cup and then fill to 1 cup. Let it sit for 5 minutes before using your desired amount.

Monday, June 3, 2013

Bar Cookies

I had such a great weekend, which makes Monday even more difficult. I'm definitely not one of those people that lives for the weekend, because generally my week days are pretty great too. However, there is just something about the weekend and having the ability to decide what to do or what NOT to do. I suppose it is that extra sense of freedom that most desire. 

So, this blog is dedicated to dessert bars. Most bars are so easy, quick and generally provide a punch of flavor. These ones do just that. The first of the two provides a punch of lemon. Yet it's not overpowering. 

I originally saw this recipe over here.


Lemon Oat Bars

1-14 oz. can sweetened condensed milk
3 tsps grated lemon zest
1/4 c fresh lemon juice
1 1/4 c flour
1 c old fashioned oats
1/2 c packed brown sugar
1/2 c unsalted butter, softened
1/4 tsp baking soda
1/4 tsp salt


Mix sweetened condensed milk, lemon zest and lemon juice in bowl. In a separate bowl using a fork mix flour, oats, brown sugar, butter, baking soda and salt  until it starts to form crumbles. Once it crumbles or starts to pull together press half of the mixture into the bottom of a 8x8 greased pan. Then spread the sweetened condensed milk and lemon mixture over top. Top with the remaining oat mixture.  I sort of made oat patties in my hand and then placed them atop of the milk mixture in order to get better coverage.  Bake for ~20 minutes or until edges are golden brown in a 375 degree F oven. Let cool before cutting and serving. 

Just a few tips: if you want more oat coating on the top I would double the dry ingredient part of this recipe. 1/2 of this recipe was just not enough to cover the top if you are just dropping the crumbles on. Also, I suggest refrigerating before serving and keeping the leftovers (if there are any) in the fridge as well.


The next bar recipe also packs a punch, but this time with rhubarb! As I've stated before, I have an over abundance of rhubarb. Luckily I love it, especially strawberry rhubarb jelly! Maybe some day I'll share that recipe with you. Until then enjoy this delightful treat. A version of this recipe was on Taste of Home.

Rhubarb Oat Bars
1 1/2 c chopped rhubarb (fresh or frozen)
1 c brown sugar
4 tblsp water
1 tsp lemon juice
4 tsp cornstarch
1 c old-fashioned oats
3/4 c flour
1/2 c flaked coconut
1/2 tsp salt
1/3 c butter, melted

Combine rhubarb, sugar, 3 tblsp water and lemon juice in a saucepan. If you are using frozen rhubarb, thaw beforehand and drain out excess water/liquid. Bring the mixture to a boil, reduce heat and then cook for 5 minutes or until the rhubarb is soft. Make a slurry with cornstarch and 1 tblsp water, and gradually stir into the rhubarb mixture. Bring back to a boil and let cook for roughly 3 mins while stirring. The mixture should be thick. Set aside and let cool. 

Mix together the oats, flour, coconut, salt and melted butter until it starts to come to crumbles. Press 1/2 of the mixture into a greased 8x8 pan. Evenly spread the cooled rhubarb atop the oats. Top the rhubarb layer with the remaining oat mixture. Covering entirely. Bake at 350 degree F for ~25 minutes or until edges are golden brown. Cool before serving


Enjoy! Let me know if you enjoy bar cookies just as much as I do!

Saturday, June 1, 2013

Spinach and Feta Stuffed Flank Steak

I spent the entire last evening planting. Keeping up with a large garden is hard work. We have a very short growing season. And this year's growing season seems a little off kilter already. We went from winter straight to summer it seems. One week it was 30 the next 90 degrees; which makes it very hard to plant and maintain things. Try tilling dirt in 90 degree weather or better yet mixing manure or compost. Heat and manure is a deadly combination, I promise. 

So, with all that, dinner had to be simple and done outside on the grill. Warm weather calls for outdoor cooking in my book, especially when you only get to do it a few months out of the year. 

Also, you know what I love?  Great fake out meals. You know, the ones that look like they took hours and seem really impressive, but were super easy to prepare. That is just what this recipe is. Everyone will be impressed, because it looks fancy; but it's totally not. All you need is 5 mins to prepare and a few ingredients. 


This recipe calls for flank steak, so here are a few facts for you to ponder. For the most part flank steaks are all about the same, they range from 1 to 2 pounds in weight and are usually ~12 inches long, ~6 inches wide and an inch thick. They are like this because of their location on the cow. Flank steaks come from behind the rib cage, beneath the loin and in front of the rear legs. They are also a lot leaner than a skirt steak and the muscle composition is very evident. There is a lot to picking the right cut of meat, let alone deciding which flank steak looks the best. In any case, here are a few tips on picking the right flank steak: 

1. make sure the steak is uniform in width to aid in even cooking
2. be sure it has a nice dark red color-closest comparison is probably to a bing cherry (so no brown looking meat)
3. look for marbling or spidery white lines running through it (in general because flank steak is so lean the more marbling the better-it really is what gives your steak flavor when the fat melds into the meat while cooking)
4. last but not least, make sure it does NOT smell! Nobody wants stinky meat! ;)


By the way, I spied this recipe on Family Circle awhile ago, if you want to go check it out and others like it.

Spinach and Feta Stuffed Flank Steak
2 lb flank steak
1 15 oz jar roasted red peppers, diced
1 package frozen spinach, thawed and drained
1 clove garlic, minced
8 oz feta cheese, chunked
salt and pepper


Flatten your flank steak by pounding it with a meat tenderizer. I also let it sit with a little lemon juice to soften up the muscle. While your steak is resting, mix together red peppers, spinach, garlic and cheese. Sprinkle your steak with salt and pepper and then spread the mixture evenly across as pictured. It would probably be best to leave a 1 inch border, because I had to stuff some of the stuffing back in.


Roll the steak up, pressing tightly as you go. Tie it up in 3 locations using butcher's twine or cotton string. Now salt and pepper the outside as well. Pay attention to the grain of the meat and which way it is running.

Next I seared the outsides of my steak on a 500 degree grill. You need a very hot grill to get a nice sear. Once all sides were nicely seared  I wrapped it up in foil and moved it to the low heat side of my grill. I  let it cook there for 20 mins.


It looks like this when it first comes off the grill, as tempting as it is you need to let it rest for ~10 mins. If you cut into it too soon, all the juices run out.


Slice the steak against the grain and it will look all lovely and beautiful, and like you spent hours preparing this dish.


                           Serve a top a mountain of grilled romaine like so, or anything you've got on hand. 

Just a little fyi, hearts of romaine are amazing grilled. Sounds a little crazy, right? Lettuce? Grilled? I promise, drizzle on some olive oil, sprinkle on some salt and pepper and you've got yourself a tasty side dish. It surprised my entire family, go ahead give it a try and let it surprise yours too.